Guide to Create a Community Profile


Here's how to create your Community profile on ProjectManagement.com:
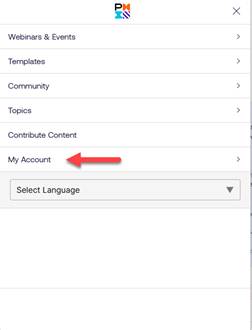
Get Started on Mobile:
- Go to www.ProjectManagement.com
- Click on the menu icon on the top right of the home screen
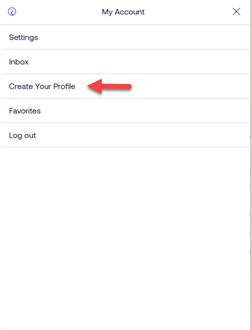
- Click on “My Account” to expand the options, and select “Create Your Profile”
- Click on the “Create Profile” button to begin the three-step process

Get Started on Desktop:
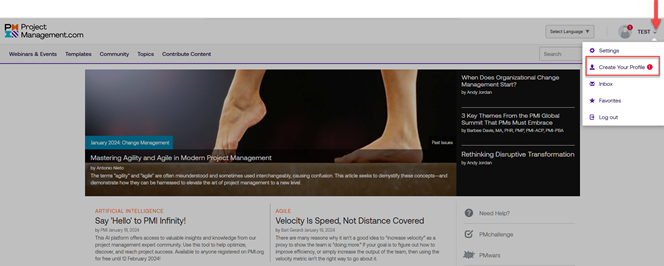
- Go to www.ProjectManagement.com
- Click on the arrow next to your account name at the top right of the page
- Select “Create Your Profile” from the drop-down menu options
Create Your Profile:
- Complete the required fields and click on the “Continue” button to advance through the process
- After completing step three, click on “Create Profile” to complete the process
- Once you have created your community profile, you will be prompted to “Begin Tour” to complete your profile information and learn about the features.
- Upload a profile photo
- Add a short biography, specialties and certifications
- Earn badges
- Fill out a resume
- Give and/or receive recommendations
NOTE: These steps do not need to be completed in order to consider your profile “active”. They may be completed later and in any order.
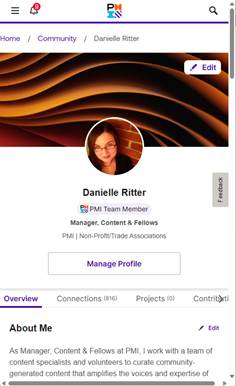
Show Off Your Profile:
- Log in on www.ProjectManagement.com
- Click on the menu icon on the top left of the home screen
- Click on “My Account” to expand the options, and select “Profile” to open your profile
Comments (2)
Login/join to subscribe
ADVERTISEMENTS
|
When someone is lying, is it true that their pants are actually on fire? - Jerry Seinfeld |